The quick answer
A home energy assessment, or audit, identifies where a home wastes energy and which improvements are worth considering. Professional assessments can include air-flow testing and a written report, while renters and homeowners can start with bills, comfort notes, and safe DIY checks. Savings are not guaranteed; compare estimated annual energy savings with your own rates, installed costs, and safety needs before authorizing work.
A home energy assessment—often called a home energy audit—is a structured way to find out where a house wastes energy, which fixes are worth considering, and what safety or comfort problems may be hiding behind high bills. It is not a single product or a guaranteed savings contract. It is a decision tool: it gives you a baseline, a list of possible improvements, and, if the assessor provides them, estimates you can compare.
This guide is for renters, homeowners, and people facing higher bills who want to know what an assessment covers, what they can check themselves, how to read a report, and how to turn estimated energy savings into dollar terms. It focuses on U.S. households, where electricity is usually billed in kilowatt-hours (kWh) and natural gas in therms, and where utility programs and local prices vary widely.
What a home energy assessment is—and what it is not
The U.S. Department of Energy describes a proper home energy assessment as the essential first step to lowering energy bills and says it tells you how much energy you use, the most cost-effective measures you can take, and how to save money. NYSERDA describes an assessment as an overview of a home’s energy use that pinpoints waste, flags safety or health issues, and identifies energy-saving opportunities.
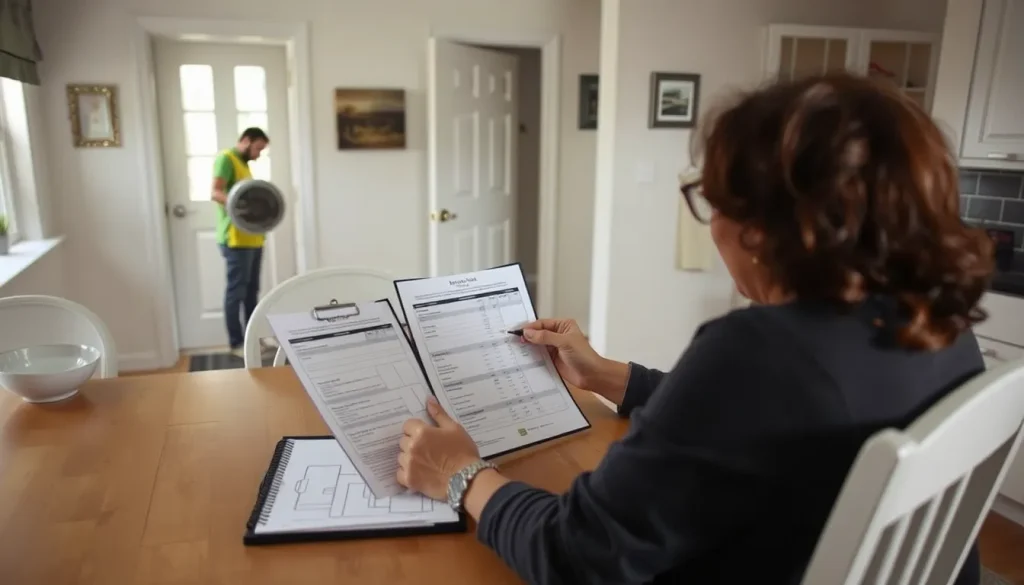
A professional assessment is usually a detailed, quantitative evaluation. The auditor can use special equipment to measure the rate of air flow between the inside and outside of the house. A blower-door test is the common example: a fan and frame temporarily fit into an exterior doorway, and the assessor measures how much air leaks in. The auditor may also inspect insulation, heating and cooling equipment, water heating, windows, doors, and ventilation. An assessment is broader than a quick visual walk-through, but it is not the same as a contractor’s bid for one specific job.
Terms are loose. ‘Audit’ and ‘assessment’ are often used interchangeably. ‘Rating’ may refer to a scored comparison of a home’s efficiency; in Australia, for example, NatHERS-accredited assessors use software to calculate a home energy rating, as NSW Climate and Energy Action explains. In the U.S., program names and report formats vary by utility, state, and contractor. Ask what you are buying: a walk-through, a blower-door test, a combustion safety check, a written report with estimated savings, or a quote for work.
What an assessment is not
It is not a guarantee that bills will fall. Savings depend on the measures installed, how the house is operated, weather, rates, and whether the work is done correctly. It is also not a substitute for a licensed electrician, gas fitter, or other qualified trade when the issue is electrical, gas, or hazardous.
What assessors examine
Scope varies, but a useful assessment generally looks at the building envelope and the equipment that uses energy. NSW’s household guidance lists fixed appliances such as heating, cooling, and hot water; insulation, ventilation, and draughts; walls, windows, roofs, and shading; and the orientation of the home and living areas. The assessor then enters data into specialized software to estimate energy use and identify improvements.
In a U.S. home, the review may include:
- Building envelope: attic and wall insulation, rim joists, foundation, windows, doors, and visible gaps or cracks. Air leaks can show up as drafts, uneven room temperatures, or ice buildup.
- Heating and cooling: equipment type, age, condition, thermostat settings, duct location and sealing, filters, and ventilation.
- Water heating: fuel type, tank or tankless, temperature setting, pipe insulation, and location.
- Appliances and lighting: refrigerator, washer, dryer, dishwasher, dehumidifier, pool pump, and lamps—especially where they run many hours.
- Health and safety: combustion appliances, exhaust ventilation, moisture, mold risk, and carbon monoxide concerns. These are reasons to use a qualified professional rather than guessing.
Not every assessment includes every item. A utility-sponsored walk-through may be shorter and lower-cost; a comprehensive assessment with diagnostic testing may take longer and cost more. One consumer guide lists an upfront cost of $0–$900 and a time of 2–3 hours for a home energy audit, but that range is not a local quote, and program discounts can change the out-of-pocket price.
The blower door and air leakage
A blower door is a fan and frame temporarily fitted into an exterior doorway. It depressurizes the house so the assessor can measure how much air leaks in through gaps and can use smoke or other tools to locate some leaks. The result is not a pass-fail grade for your home. It is a baseline that can help prioritize air sealing and show whether a problem is large enough to justify more than weatherstripping. A blower-door test also needs care in homes with combustion appliances, because changing pressure can affect exhaust; that is a professional safety matter.
Choosing an assessor or program
Start with your utility, state energy office, or local weatherization program, then compare private assessors. Ask what is included: Is air flow measured? Are combustion appliances checked? Do you provide a written report with annual kWh or therm savings and installed-cost ranges? Are you independent of the contractor who will do the work? How do you handle incentives? What insurance and licensing do you carry? The last point matters for work, not just assessment.
Independence is not a guarantee of quality, but it reduces the risk that the assessment is mainly a sales visit. Some programs use approved contractors who both assess and install. That can be convenient, but ask for the scope and cost breakdown separately. If the assessor recommends a large project on the first visit, take the report, get another quote, and compare assumptions.
What you can do before paying for an assessment
A little preparation makes a paid assessment more useful. You do not need to diagnose the house yourself. You do need to give the assessor a clear picture of how the home is used and what bothers you.
Gather 12 months of bills
Collect electricity, natural gas, propane, oil, or other fuel bills for a full year. If you have online utility data, download monthly usage and cost, not just the amount due. Note the period, rate plan, and whether the bill includes fixed charges, taxes, and fees. A single winter bill can mislead; a full year shows seasonal patterns and lets you compare an assessment’s annual estimates with actual use.
Make a room-by-room list
List heating and cooling equipment, water heater, refrigerator, freezer, washer, dryer, dishwasher, dehumidifier, pool pump, and any always-on equipment. Record model numbers if visible. Note rooms that are too hot, too cold, drafty, damp, or stuffy. Note any ice dams, condensation, mold, backdrafting, or combustion smells. Those are safety and comfort clues, not just efficiency clues.
Do simple air-leak checks
The U.S. Department of Energy describes do-it-yourself air-leak detection: at night, shine a flashlight over potential gaps while a partner observes from outside for light rays; and shut a door or window on a piece of paper—if the paper pulls out without tearing, it suggests an air leak. These checks are inexpensive and can point to obvious gaps. They do not measure total leakage, find hidden leaks, or replace a blower-door test, and the flashlight method may miss small gaps.
Check the easy operational items
Before authorizing upgrades, confirm thermostat schedules, air-filter condition, dryer-vent condition, and obvious blocked returns or vents. These are low-cost checks, not a full assessment. Do not open electrical panels, disconnect gas appliances, or enter crawl spaces with unsafe conditions; use a qualified professional.
How to read the report and compare recommendations
A good report should separate observations from recommendations. Look for four things:
- Baseline: annual energy use and cost by fuel, and the assumptions used for weather, occupancy, and equipment.
- Findings: where energy is lost or used inefficiently—air leakage, insulation, ducts, water heating, appliances, lighting, or controls.
- Recommended measures: what to do, expected life, interactions with other work, and whether the measure is health-and-safety related.
- Numbers: estimated annual energy savings in kWh or therms, estimated installed cost, available incentives, and simple payback. If these are missing, ask whether the assessor can provide them or whether you need contractor quotes.
Do not compare recommendations by ‘percent savings’ alone. A 20% saving on a small load can be less useful than a 5% saving on a large load. Compare annual energy units, then convert to dollars using your own marginal price. Also separate energy savings from bill savings: fixed monthly charges, taxes, and fees may not change when you use less energy, and a tiered or time-of-use rate can make the value of each saved kWh different from your average rate.
The basic arithmetic is:
annual bill savings = annual energy savings × marginal price per unit
For electricity, the unit is usually kWh. For natural gas, it is usually therms. If a report gives savings in dollars, check which rate and period it used. If it gives savings in kWh, use your own rate and recalculate.
A worked example with explicit assumptions
The following is an illustrative example, not a prediction for your home. It uses a hypothetical household, a hypothetical electricity price, and hypothetical assessment findings. The purpose is to show the arithmetic and the questions to ask.
Assumptions: The household pays a flat marginal electricity price of $0.17 per kWh for the relevant usage. The assessment estimates annual savings for three measures. We ignore fixed charges, taxes, incentives, financing, and interaction between measures. We assume the same usage and service level after the work. Costs are hypothetical installed costs in USD.
| Measure | Estimated annual energy savings (kWh) | Illustrative installed cost (USD) | Annual bill savings at $0.17/kWh (USD) | Simple payback (years) |
|---|---|---|---|---|
| A. Air sealing and weatherstripping | 1,200 | 800 | 204 | 3.9 |
| B. Duct sealing in conditioned space | 350 | 150 | 59.50 | 2.5 |
| C. High-efficiency replacement equipment | 2,500 | 4,000 | 425 | 9.4 |
Arithmetic: For measure A, 1,200 kWh × $0.17/kWh = $204/year. Simple payback = $800 ÷ $204/year = 3.92 years, rounded to 3.9. For measure B, 350 × 0.17 = $59.50; $150 ÷ $59.50 = 2.52 years, rounded to 2.5. For measure C, 2,500 × 0.17 = $425; $4,000 ÷ $425 = 9.41 years, rounded to 9.4.
How to interpret it: Measure B has the fastest simple payback, but it also has the smallest absolute dollar savings. Measure C saves the most energy and dollars per year but costs the most and has the longest payback. Measure A is in between. Simple payback ignores equipment life, maintenance, comfort, safety, and incentives, so it is a screening tool, not a final answer. If the assessment says the equipment is near the end of its life, replacing it may be sensible even with a longer payback; if the equipment is new, the same recommendation may be premature. If air sealing must be done before insulation to avoid moisture problems, the measures are not independent and should be priced as a package.
Also recalculate with your own rate. At $0.12/kWh, measure A would save $144/year and pay back in 5.6 years; at $0.25/kWh, it would save $300/year and pay back in 2.7 years. The measure did not change; the price did. That is why an assessment’s dollar estimate should state its rate assumption.
Renters, homeowners, and multifamily buildings
Who controls the work changes the next step. The table below compares decision paths, not prices or legal rights.
| Situation | What you can do | Main limitation | Sensible next step |
|---|---|---|---|
| Renter paying utilities | Collect bills, do safe DIY checks, ask the landlord for an assessment or repairs. | You may not control upgrades or get landlord approval. | Put requests in writing; focus on portable, reversible, renter-safe actions. |
| Homeowner | Authorize a professional assessment, get multiple quotes, verify incentives, schedule work. | You bear upfront cost and contractor risk. | Use the report to compare measures by annual savings, payback, safety, and comfort. |
| Landlord or multifamily owner | Assess whole-building systems and common areas; coordinate tenant communication. | Split incentives: the owner may pay for work while the tenant pays utilities, or the reverse. | Separate envelope and equipment work from tenant behavior; document assumptions. |
This table establishes that the same assessment finding can lead to different actions depending on who pays the bills and who can authorize work. It does not establish legal rights or program eligibility; check your lease and local programs.
What changes the result—and common mistakes
Assessments are estimates. The biggest sources of uncertainty are weather, occupancy, equipment performance, and the gap between modeled and installed work. A report may assume a typical weather year; a colder winter can raise use even after upgrades. A family may add a home office or a new appliance, changing the baseline. Duct leakage and insulation performance can be hard to measure without diagnostics.
Common mistakes include:
- Treating rated watts as average use. A space heater rated at 1,500 W does not necessarily use 1,500 W all day. Cycling, thermostat setting, and room conditions matter. The same caution applies to appliances with variable loads.
- Mixing periods. Do not compare a monthly bill with an annual savings estimate. Use a full year or clearly state the season.
- Ignoring fixed charges and rate design. A lower kWh total may not lower the fixed portion of the bill. Tiered, time-of-use, and demand charges can change the value of savings.
- Assuming every recommendation is cost-effective. A measure can save energy and still be a poor financial choice if it is expensive, short-lived, or likely to be replaced soon.
- Skipping safety. Combustion appliances, exhaust, moisture, and electrical work are not DIY efficiency projects. Use qualified professionals.
- Not getting written scope and quotes. ‘Air sealing’ can mean a tube of caulk or a whole-attic job. Compare scope, materials, testing, and warranty, not just price.
Practical next steps
Use this checklist to move from bills to a decision without overcommitting.
- Spend 30 minutes on a bill summary. Gather 12 months of electricity and fuel bills. Write down annual kWh, annual therms or gallons, total cost, and your rate plan. This is your baseline.
- Walk the home and list comfort problems. Note drafty rooms, condensation, ice dams, hot ceilings, mold, and equipment age. Take photos of model plates and visible gaps.
- Do only safe DIY checks. Use the flashlight and paper tests for obvious air leaks. Check filters and thermostat schedules. Do not open electrical panels, disconnect gas lines, or enter unsafe spaces.
- Ask your utility or state program what is available. Programs can offer low-cost assessments, rebates, or income-qualified weatherization. Terms vary; confirm eligibility and whether the program uses its own contractor list.
- Choose the assessment scope. If you have high bills, drafts, moisture, or health concerns, ask for a comprehensive assessment with diagnostic testing and a written report. If you mainly need a priority list, a shorter walk-through may be enough—but ask what is excluded.
- For renters, ask the landlord in writing. Request an assessment or specific repairs. If you pay the utilities, say so. Keep copies. Focus on reversible actions you are allowed to take, such as weatherstripping a door if permitted, using draft stoppers, adjusting blinds, and changing filters.
- Read the report before signing work. Check the baseline, assumptions, estimated annual kWh or therm savings, installed cost, incentives, and safety flags. Ask for the calculation if only a dollar savings figure is given.
- Get at least two quotes for larger work. Compare scope, materials, testing, warranty, and whether the contractor will verify performance. For electrical, gas, or hazardous work, use appropriately qualified professionals.
- Track one year of bills after the work. Compare weather-adjusted use if possible. If savings are far from the estimate, ask the contractor or assessor what changed.
Cheap checks and upgrades are different decisions. A $10 door sweep or a filter change is a low-risk experiment. A $4,000 equipment replacement is a capital decision that deserves quotes, a load calculation where relevant, and a clear look at remaining equipment life. Do not let a free walk-through pressure you into a large contract on the same visit.
The most useful first step is not to buy a gadget. It is to establish a baseline: 12 months of bills, a room-by-room list, and a few safe observations. If those point to drafts, high bills, moisture, or equipment problems, use a professional assessment to get a prioritized, written plan. Then compare recommendations on annual energy units, your own marginal price, installed cost, and non-energy benefits—and fix health and safety issues before cosmetic efficiency work.
FAQ
Is a home energy assessment the same as a home energy audit?
The terms are often used interchangeably. In practice, ask what the specific service includes: a visual walk-through, diagnostic air-flow testing, combustion safety checks, a written report, or a contractor quote.
How much does a home energy assessment cost?
Costs vary by location, scope, and program. One consumer guide lists $0–$900 upfront and 2–3 hours, but that range is not a local quote. Utility or state programs may reduce the out-of-pocket cost, so check eligibility before hiring.
Can renters get a home energy assessment?
Renters can ask their landlord for an assessment or for specific repairs. Whether the landlord agrees, who pays, and what work is allowed depend on the lease and local rules. Renters who pay utilities have a direct reason to request one, but they may not control installation decisions.
Will an assessment guarantee lower energy bills?
No. An assessment estimates where savings may come from. Actual bills depend on installed measures, work quality, weather, occupancy, equipment, and your rate structure. Compare estimated annual kWh or therm savings with your own marginal price and installed cost.
What should I have ready for an assessment?
Gather 12 months of electricity and fuel bills, a list of appliances and equipment, and notes about drafty or uncomfortable rooms. Mention moisture, mold, combustion smells, or other safety concerns. Clear access to attics, mechanical areas, and exterior doors where safe.
Should I do DIY checks or hire a professional?
Safe DIY checks such as a flashlight air-leak test, bill review, and filter check are useful starting points. Hire a qualified professional for diagnostic testing, combustion safety, electrical or gas work, and any large upgrade. Do not open electrical panels or disconnect gas appliances yourself.
Follow the evidence
Sources & references
- U.S. Department of Energy. Guide to Home Energy Assessments. https://www.energy.gov/sites/default/files/guide_to_home_energy_assessments.pdf. Retrieved November 4, 2026.
- NYSERDA. The Complete Guide to Home Energy Assessments. https://www.nyserda.ny.gov/Featured-Stories/The-Complete-Guide-to-Home-Energy-Assessments/. Retrieved November 4, 2026.
- Rewiring America. Start Smart: Affordable Home Energy Audit Guide. https://homes.rewiringamerica.org/projects/energy-audit-homeowner. Retrieved November 4, 2026.
- NSW Climate and Energy Action. Home energy assessments and ratings. https://www.energy.nsw.gov.au/households/upgrades/home-energy-assessments-and-ratings. Retrieved November 4, 2026.
Useful terms in this guide
- Home energy assessment
- A review of how a home uses energy, where it wastes energy, and which improvements may help. Also called an energy audit.
- Blower door
- A temporary fan-and-frame device fitted into an exterior door to measure air leakage and help locate gaps.
- Air sealing
- Closing unintended gaps and cracks in a building envelope to reduce drafts and air leakage.
- Weatherization
- A set of efficiency and safety improvements, often including air sealing, insulation, and ventilation work.
- Simple payback
- Installed cost divided by estimated annual savings, expressed in years. It is a screening tool, not a full financial analysis.
Have a question about these numbers?
Tell us what needs a closer look.